All About Skimboarding
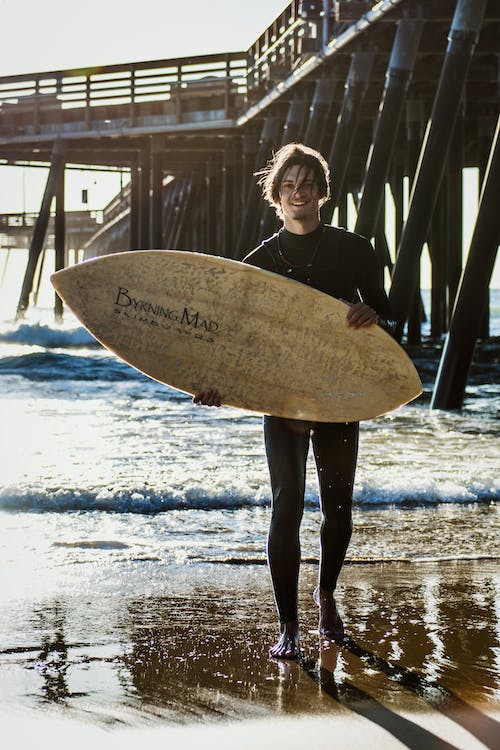
If you want to learn a new, edgy, and physically-challenging water sport and beach hobby but don't want to deal with the challenge of chasing big waves on a surfboard – perhaps skimboarding could be right down your alley. With this sport, all you need are some waves, a slick shore, a skimboard, a ton of patience, and a tough backside for falls. If you are considering learning how to skimboard, here's an introductory guide you don't want to miss. Learn about skimboarding and its history, as well as some techniques, tips, and tricks you need to know so you can try it out while in the know.
What is Skimboarding?
Combining the elements of wakeboarding, skateboarding, and wakeskating, skimboarding is a water sport that involves riding a skimboard along the shoreline or shallow water. This sport requires a rockered skimboard and a shallow stretch of water. Skimboards are typically small, flat boards made of foam, fiberglass, or wood, designed to glide smoothly over the water's surface.
Their own momentum propels the skimboarder. The basic concept of skimboarding is to run toward the water, throw the board onto the wet sand or into the shallow water, jump onto the board, and ride it as it skims across the water's surface. Skimboarders can perform a variety of maneuvers, such as slides, turns, spins, and tricks, by shifting their weight, using the momentum of the waves or shoreline, and utilizing their balance and agility.
There are two main types of skimboarding: wave riding and flatland skimboarding. Wave riding involves catching waves and riding them, similar to surfing, while flatland skimboarding takes place in shallow water or on wet sand, allowing riders to perform tricks and maneuvers on a flatter surface.
People of all ages and skill levels can enjoy skimboarding. It offers a thrilling and challenging experience as riders try to maintain balance, navigate the waves or shoreline, and showcase their creativity through various tricks and stunts. Skimboarding can be practiced in various coastal areas, including beaches, estuaries, and lakeshores, depending on the availability of suitable conditions.
History of Skimboarding
Skimboarding emerged in the mid-1920s as a means of swift travel for lifeguards along the beach. Originally, lifeguards used basic wooden boards to skim across the shoreline, allowing them to reach swimmers in distress more quickly. It started in California when Laguna Beach lifeguards George Griffeth and his friend Jimmy built rounded disks made of redwood and used them to slide across the water. These disks were about five-foot long with no curve and were towed behind a board like a wakeboard.
Later on, this became known as the "pizza board" and became the standard shape for skimboards until the early 1960s, when a new design appeared and mimicked a smaller, wide surfboard. Back then, the activity was called "skateboarding," but when Tex Haines and his partner established Victoria Skimboards in 1976, the activity was known as "skimboarding." Victoria Skimboards introduced the first foam core skimboard covered in resin and fiberglass in 1980. Soon after that, skimboards were sold alongside surfboards in high-end surf shops.
As the sport gained traction, two types of skimboarding arose: wave riding and flatland skimboarding. Foam skimboards soon gained prominence in the world of wave riding, while wooden skimboards evolved to cater to flatland skimboarders, enabling individuals to apply their skateboarding skills on the beach.
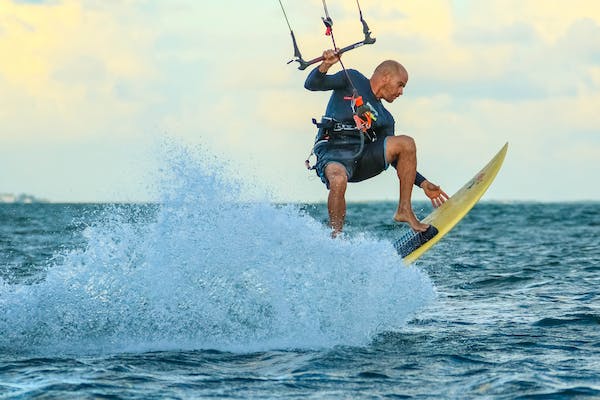
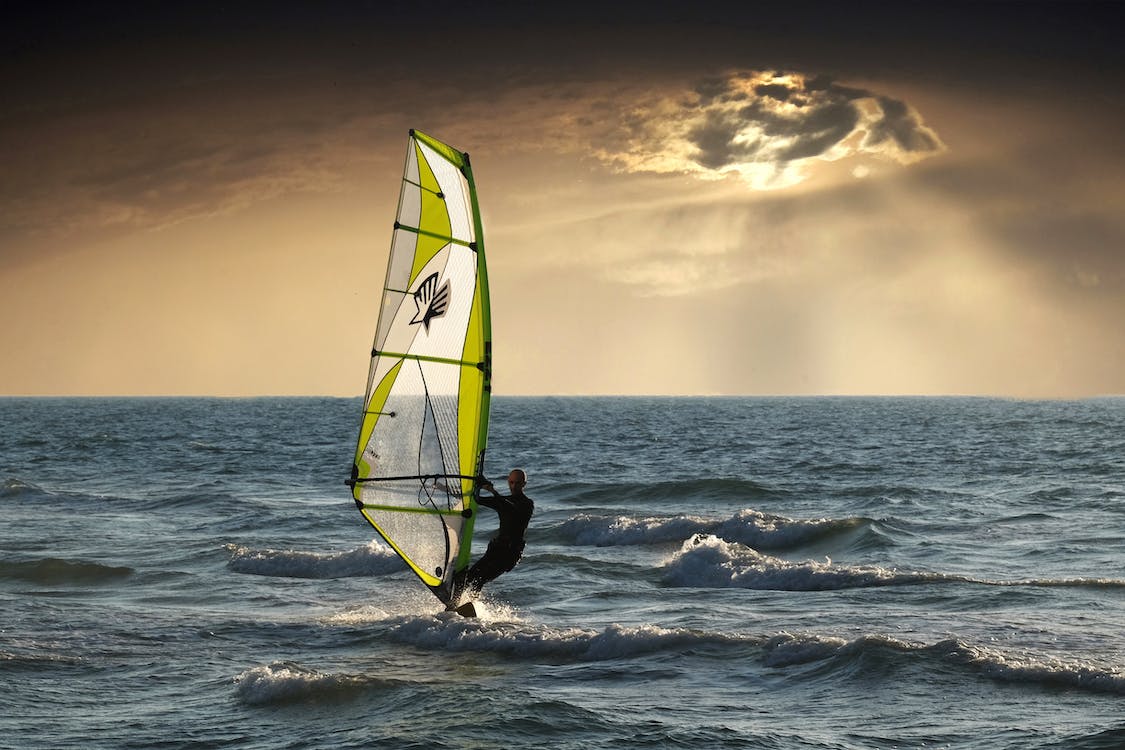
In September 1987, Sports Illustrated featured Tom Trager on the cover, where he was riding a skimboard. It created more exposure for the sport, but in the following decade, skimboard sales declined as kiteboarding exploded and surfing became TV-friendly. Fortunately, new magazines and competitions still started to emerge, and skimming regained fans and new participants.
In recent years, flatland or inland skimboarding has experienced significant growth, and for a good reason—it can be practiced in a wide array of locations. Whether it's a tidal pool, a river, a flooded street, or even your own backyard, the possibilities for skimboarding are nearly limitless. While it is challenging to pinpoint the exact origins of flatland skimboarding, its development can be traced through influential riders, skimboard companies, and competitions.
One crucial figure in the rise of flatland skimboarding is Jim Gordon, the owner of J-Gordon Skimboards. Gordon began crafting skimboards around 1980, initially designing them for riding waves. Unbeknownst to him, Go Skate in Santa Cruz, CA, was distributing his boards to their store in Sacramento. He was intrigued when he discovered that people in Sacramento were skimboarding in rivers and utilizing skateboarding techniques, such as sliding on logs and tables and performing ollies. This revelation occurred a few years after he had started producing ocean skimboards in the early 1980s. As foam skimboards gained popularity for riding waves, Gordon's wooden skims lost prominence, but the flatland skimboarding community kept his business afloat.
The concept of flatland or inland skimboarding has always existed, but it required a series of events and influential individuals to gain significant attention. Lon Porteous and Mark Robertson, both considered pioneers of inland/flatland skimboarding, played essential roles. Porteous, who began riding Gordon's boards in the early 1990s, claimed to have always owned one of his boards. Robertson also had a similar experience, riding Gordon's boards as a child and later becoming a vital figure in the sport. These two and their crew established Skimfest, a competition aimed at nurturing the next generation of skimmers.
During the late 1990s and early 2000s, there was a significant surge in the sport's popularity. During this time, many advanced tricks were adapted from skateboarding and snowboarding and incorporated into skimboarding. As the number of riders and competitions increased, various websites emerged to promote and support skimboarding. Skimboarding websites have played a significant role in pushing news and media to a larger audience than ever before.
Today, skimboards are more technologically sophisticated, combining advanced elements from the aerospace industry with the knowledge of experienced craftsmen. Three companies, namely Victoria Skimboards, Zap Skimboards, and Exile Skimboards, share a large majority of the skimboarding market.
The sport has transcended geographical boundaries and is now practiced in numerous locations worldwide. People have taken to skimming the Great Lakes, Texas, Holland, Germany, New Zealand, Poland, Louisiana, England, and countless other mudflats, flooded golf courses, and fountains across the globe. In fact, some enthusiasts have even dared to start local skim tours, exemplified by the now-defunct Northwest Skim Tour, as an initial step toward creating a comprehensive flatland tour that brings together various contests and skimming communities. What once seemed like a far-fetched idea has become a tangible possibility, with the European contest scene thriving through events like the European Skimboarding Cup.
Wave Riding Vs. Flatland Skimboarding
When it comes to skimboarding, there are two main types: wave riding and flatland skimboarding. Each type offers a unique experience and caters to different preferences and environments.
Wave Riding Skimboarding
Wave riding skimboarding involves riding waves close to the shoreline. Skimboarders wait for incoming waves, drop their boards onto the water, and quickly jump on to ride the wave face. This type of skimboarding is similar to surfing but with the advantage of being closer to the shore and catching waves earlier. Wave riding skimboards are typically designed to handle the power and speed of waves, with shapes optimized for maneuverability and control in the surf.
Flatland Skimboarding
Flatland skimboarding, also known as inland skimboarding, takes place in non-surfable water bodies such as rivers, lakes, puddles, or even flooded streets. Unlike wave riding, flatland skimboarding focuses on skimming across flat water surfaces rather than catching waves. Skimboarders use their momentum and the shallow water to slide, glide, and perform various tricks and maneuvers. Flatland skimboarding offers the freedom to explore different environments and get creative with tricks, such as ollies, spins, slides, and rail rides. Skimboards for flatland skimboarding are often designed to provide stability, buoyancy, and maneuverability on flat water.
Both wave riding and flatland skimboarding have their own dedicated communities, competitions, and styles. Wave riding emphasizes the thrill of riding waves and carving turns, while flatland skimboarding offers a playground for technical tricks and freestyle creativity. Some skimboarders enjoy both types, switching between wave riding and flatland depending on the conditions and their preferences
How to Choose the Right Skimboard
Choosing the right skimboard involves considering several factors to ensure it suits your riding style, skill level, and the conditions you'll be riding in. Here are some tips to help you select the right skimboard:
1. Keep your weight and body dimensions in mind
The size of the skimboard is a crucial factor. Generally, skimboards are sized based on the rider's weight and skill level. Lighter riders usually opt for smaller boards, while heavier riders require larger boards for better buoyancy and stability. As a general guideline, the skimboard should reach somewhere between your mid-thigh and your chest when standing it upright.
2. Choose the right shape
Skimboards come in various shapes and designs, each catering to different riding styles and conditions. Here are some of the common shapes of skimboards:
- Round nose – This is a classic shape with a rounded nose and a narrower tail. Round-nose skimboards are versatile and suitable for both wave riding and flatland skimboarding. They provide good control and maneuverability.
- Pointed nose – Skimboards with a pointed nose are primarily designed for wave riding. The pointed shape helps with wave entry, allows for smoother transitions, and turns on the face of the wave.
- Square nose – Square nose skimboards have a straight, square-shaped front end. They are commonly used for flatland skimboarding and are designed to glide smoothly on shallow water or wet sand. It provides stability and is often preferred by beginners.
- Bat tail – The bat tail shape features a wider tail with rounded corners, resembling the shape of a bat's wings. This design provides increased surface area for better stability and lift. Bat tail skimboards are popular for wave riding, especially in larger surf.
- Fish tail – Fish tail skimboards have a split tail design, similar to the shape of a fish's tail. This shape enhances maneuverability and allows for tighter turns and quick changes in direction. Fishtail skimboards are suitable for both wave riding and flatland skimboarding.
- Swallow tail – Skimboards with a swallow tail has a distinctive shape where the tail is split into two sections, resembling the shape of a swallow's tail. The swallow tail design offers improved control and responsiveness, particularly in larger waves.
- Square tail – Skimboards with a square tail has a straight, square-shaped tail end. This shape provides stability and control, making it suitable for beginners and riders who prefer a more traditional feel.
3. Consider your skill level
If you're a beginner, don't buy a pro skimboard just yet. Beginners will benefit from wider and more stable boards with a larger surface area, as they are more forgiving and stable. A board with a larger surface area has to spread out your weight, which means you will skim further easier. Intermediate and advanced riders may prefer narrower boards that allow for quicker maneuverability and better control.
4. Choose a board suitable for your preferred riding style
If you enjoy wave riding, look for a board designed specifically for riding waves, with features like a pointed nose, a narrower tail, and good maneuverability. For flatland skimboarding, a board with a wider outline and more surface area can provide better stability and glide on shallow water or wet sand.
5. Consider the material
Skimboards are commonly made of foam, fiberglass, or wood. Foam boards are lightweight and buoyant, making them ideal for beginners and lighter riders. Fiberglass boards offer enhanced performance, durability, and responsiveness for intermediate to advanced riders. Wood boards provide a more traditional feel and are often favored by experienced riders for their natural flex and durability.
6. Choose from a reputable brand
Consider the brand and reputation of the skimboard manufacturer. Established brands often have a track record of producing high-quality boards with reliable performance. Research reviews, seek recommendations from experienced riders, and consider the brand's reputation within the skimboarding community.
7. Rent before you buy
Whenever possible, try different skimboards before making a purchase. While you're starting out, rent boards at a local skim shop or borrow from friends. Trying out different boards allows you to assess how they feel under your feet, how they respond to your movements, and how they perform in the conditions you plan to ride in.
8. Stick to your budget
As a beginner, it's easy to get overwhelmed by the various skimboard options out there, and sometimes people lose interest before diving in deep. For many, skimboarding is simply a fun activity to enjoy during beach or lake vacations. If you're not planning to go pro or take it super seriously, there's no need to break the bank on a high-end performance board. Starting off with an affordable wooden skimboard will do the trick and get you started on a budget.
However, if you fall in love with skimboarding and want to take it to the next level, upgrading to a performance board will be a worthy investment and will enhance your experience.
Skimboarding Tips and Technique
Learning skimboarding can be an exciting and rewarding process. Besides choosing the right board, here are some techniques and tips to help you get started:
Practice proper foot placement
Skimboarding is like a lightning-fast sprint and leaps onto a tiny, gliding platform. The key to success lies in getting your foot placement just right. If your feet are not in the proper place, expect face plants. Start on the sand, not in the water. It doesn't matter if the sand is dry or wet (though wet sand will give you a smoother slide).
When you're ready to jump onto your skimboard, position your back foot close to the back of the board and your front foot slightly ahead of the center (but not all the way to the nose). Keep your feet about shoulder-width apart, and ensure they're aligned with the board's center line. Avoid placing your feet too far to the right or left, as this can slow you down or cause your board to dig into the sand.
Place your board stationary on the ground in front of you, and stand just behind it. Now, practice jumping onto the board with both feet. The back foot should land on the board first, followed quickly by the front foot. Lean forward to shift your weight and propel yourself and the board forward. Remember, it's always better to fall forward than to have the board slip out from under you and fall backward. As you do this, the board should slide forward a bit. Repeat this exercise a few times until you begin to get the hang of the proper foot placement.
Learn proper hand placement
When it comes to hand placement in skimboarding, there's a nifty technique that ensures a smooth ride. Picture this: one hand on the back in the middle of the board and the other hand on the side. This grip allows you to launch the board forward and minimize any unwanted spins as it touches down.
Determining which hand goes at the back of the board depends on your foot placement. Simply put, the hand that corresponds to your back foot should be placed at the back of the board when you land.
For all natural riders (right foot back, left foot forward), get ready to rock with your right hand on the back of the board while running and your left hand firmly gripping the side. But if you're a goofy footer (left foot back, right foot forward), let your left hand take charge at the back of the board during your sprint while your right hand keeps a strong grip on the side.
Find shallow waters
Look for an area with shallow water, preferably with small waves or a gentle slope. This will allow you to practice in a forgiving environment and get comfortable with the basics before tackling more challenging conditions.
Warm-up before starting
Before starting any session, warm up your body with some light exercises and stretches. Pay attention to your legs, core, and arms, as skimboarding involves balance, coordination, and upper body movements.
Learn the one-step drop
When it comes to hopping onto your skimboard with speed, ease, and consistency, there's a tried-and-true method called the one-step drop. Forget about chucking your board far ahead and scrambling to catch up because that'll only drain your momentum and send your board on wild detours. Skimboarding involves plenty of sprinting, and you don't want to exhaust yourself unnecessarily. So, let's save some energy for the fun part.
The one-step drop is a straightforward approach that allows you to start skimming quickly, though mastering it at super high speeds might take some practice. Here's how it goes:
1. Get in motion with your board held horizontally by your side.
2. As your back foot touches the ground during your stride, release your grip on the board. You can give a gentle nudge forward with your backhand, but the main focus is simply dropping the board.
3. Take one step forward with your front foot, hence the name "one step drop."
4. Plant your back foot firmly on the board, ensuring you lean forward and keep your weight centered rather than leaning back, which could lead to an unexpected tumble.
5. Place your front foot securely on the board, making sure to maintain a slight bend in your knees.
Voila! You're now gliding across the water's surface. Embrace the one-step drop, and you'll be skimming like a pro in no time, effortlessly conserving your energy for more thrilling adventures on your trusty skimboard.
Try it the traditional way
This one is the more common method for getting into the board and starting to skim. This is more intuitive than the one-step drop, but it's harder to do, and you lose a lot of momentum. But it's a great alternative method for people who are not confident with doing the one-step drop.
1. Hold your board
When it comes to mastering the art of skimboarding, the first step is to get a grip on your board. Hold it with one hand on the tail and the other on the side rail, ready for epic adventures. Lean forward and make sure to hold the board about 15 centimeters above the water, parallel to the sand. Remember, if you're left-handed, the water should be on your right side; if you're right-handed, it should be on your left side.
2. Throw the board
Once you're all set up, it's time to throw the board onto the sand or water. If you're skimming on the sand, aim to throw it right after a wave has receded back into the water, creating a thin layer of water. If you're skimming on the water, toss the board just before a wave comes rolling in. Try throwing the board parallel to the beach for an extra thrill, as it can result in a longer ride.
3. Run on the board
After the board is airborne, it's your turn to shine. Run onto the board at a steady pace, side by side with it. Avoid jumping onto the board, as that can disrupt its skim by breaking the water's surface tension. Remember to find your footing as well. Position your front foot slightly ahead of the board's midpoint, and place your back foot behind it. This stance will help you maintain balance and keep the adventure going.
Balance yourself on the board
Whether you're gliding on the water or skimming on the sand, maintaining balance is key. Keep your knees bent, distributing your weight evenly on the board while surfing the waves. This position will make your ride comfortable and help the skimboard slide smoothly and swiftly. When skimming on the sand, apply a bit more pressure on your front foot. On the water, shift your weight slightly towards the back foot. And remember, take breaks when needed, as bent knees for too long can tire even the most enthusiastic skimboarder.
Master the slide
Once you've mastered the getting-in stage, focus on sliding on the water's surface. Run toward the water, throw the board onto the water at an angle, and jump onto it. Aim to maintain balance and slide along the water as smoothly as possible. Keep your weight centered, and use your arms for balance.
Start with small waves
Once you're comfortable with the basics, progress to riding small waves. Time your drop-ins with the incoming wave, and as the wave reaches you, transition from sliding to riding the face of the wave. Practice turning and maneuvering along the wave's path.
Learn tricks gradually
As you gain confidence and skill, you can begin experimenting with tricks. Start with basic tricks like ollies, shuvits, or spins. Focus on one trick at a time, practicing it repeatedly until you feel comfortable before moving on to more advanced tricks.
Learn from others
Observe experienced skimboarders and seek guidance from more skilled riders. They can provide valuable tips, advice, and demonstrations to help you improve your technique and learn new maneuvers.
Keep going
Skimboarding takes practice and perseverance. Don't get discouraged if you fall or struggle in the beginning. Keep practicing regularly, and most importantly, enjoy the process and have fun with this dynamic sport.
Skimboarding Tricks
Skimboarding offers a wide range of tricks and maneuvers to explore as you develop in skill and confidence. Here are some common skimboarding tricks:
- Ollie – Similar to skateboarding, the ollie involves popping the board off the water's surface by quickly snapping the tail down and jumping off the board. This trick allows you to clear obstacles, such as small waves or objects on the beach.
- Shuv – A shuv is a rotational trick where the rider uses their back foot to spin the board 180 degrees or more while in the air. This trick adds style and flair to your skimboarding repertoire.
- Pop shuv – This trick is a bit more elevated than the shuv. To do this, position your foot snugly towards the back of the board. As you scoop it out of the water, aim to jump higher. Keep in mind that you'll need deeper water for this trick, as the sand may cause your back foot and board to catch unexpectedly.
- 180 and 360 Spins – These tricks involve rotating your body and board while in mid-air or on the water. A 180 spin is a half-turn, while a 360 spin is a full rotation. Spins can be performed off a wave, during a drop-in, or on flat land.
- Wrap – A wrap is a maneuver where the rider uses their body and momentum to wrap the board around them while riding. This trick involves twisting your upper body and pulling the board close to you, often combined with a spin for added style.
- Airs – Skimboarding airs involves launching yourself and the board off a wave or a slope. The goal is to perform tricks and rotations while airborne, such as grabs, tweaks, or flips, before landing back on the water or wet sand.
- Lip Slides – Lip slides are tricks where the rider rides up and along the lip or edge of a wave, often sliding or grinding on it.
- Manual – Similar to skateboarding, a manual is a trick where the rider balances on either the front or back wheels of the skimboard while riding. This trick requires careful weight distribution and control to maintain the manual position.
- Blunt Slide – A blunt slide is performed by sliding the tail or nose of the board along a surface, such as a rail or an obstacle, while maintaining balance and control. It adds a technical element to your skimboarding skills.
- Reverts – This involves performing a trick like a shuv but adds a twist before landing by reversing the rotation with your feet. It's like doing a backside pop shuv but then magically switching it to a frontside rotation mid-air, resulting in a smooth switch landing.
- Kickflip – This is one of the hardest tricks in skimboarding. A kickflip is done when the rider is airborne from an ollie, then uses the outer sole of your leading foot to make a quick forward motion. Simultaneously, the board is given a gentle flick to the side using that same leading foot. The board flips sideways in a delightful motion, and the rider will stop this motion by stomping.
- Board Transfers – Board transfers involve transferring from one skimboard to another while in motion. This can be done by jumping from one board to another or by passing the board to another rider.